SolidWorks |How to use hole table more flexible?
日期:2023-02-23 09:59:54 發布者: 瀏覽次數:次
How to use hole table more flexible?
In real situation, it may need to drill a lot of holes in an object for mounting or connecting to other components. Here is an example of Plastic Injection Mold Design below.
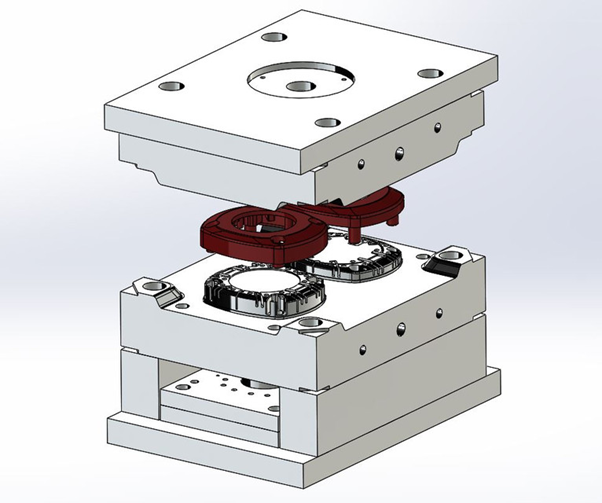
Figure 1: Plastic Injection Mold Design
It is a good way to use a Hole Table to show the details in 2D Drawing because using Smart Dimension could make the drawing view more superfluous. Also, using a Hole Table is methodical to present the information to worker or senior. Here is another example to explain how Hole Table to handle this situation.
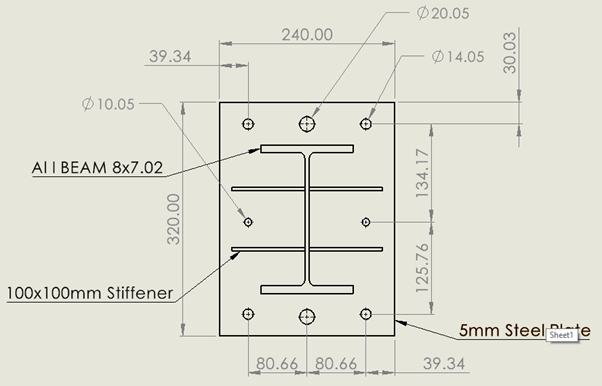
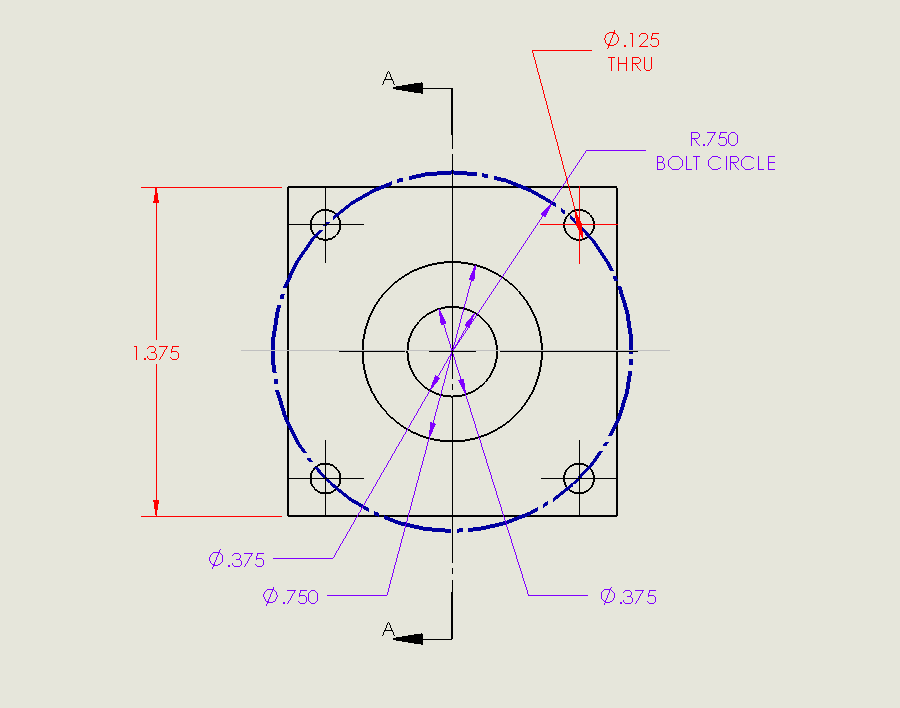
Figure 2: 2D Drawing View without Hole Table Tag
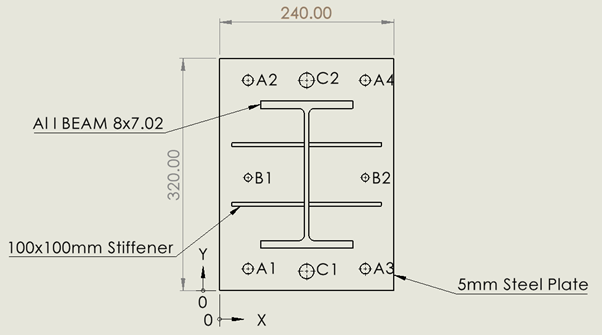
Figure 3: 2D Drawing View with Hole Table Tag
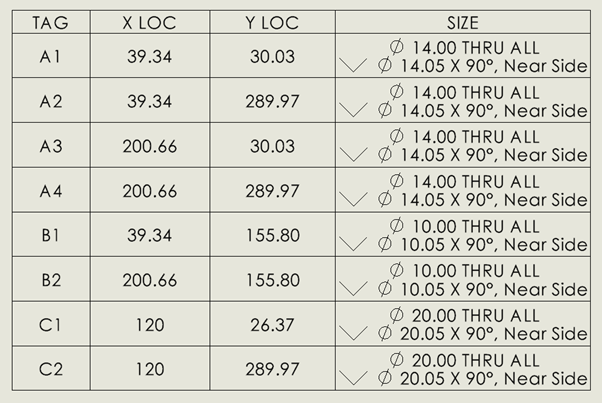
Figure 4: Hole Table
How to use Hole Table to show some holes only?
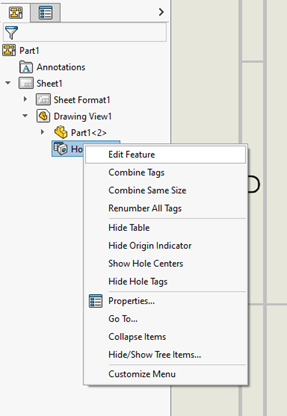
| Step 1 : Right-click the Hole Table1 under the Drawing View1 in FeatureManage Design Tree, click Edit Feature. |
Figure 5 |
|
Step 2 : Right-click the Holes box and click Clear Selections. |
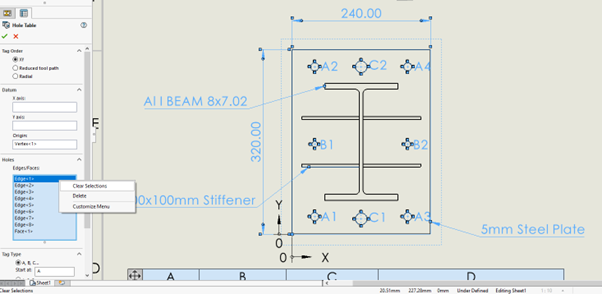
Figure 6 |
|
Step 3 : Select the edges of the holes that you want to show and click OK. |
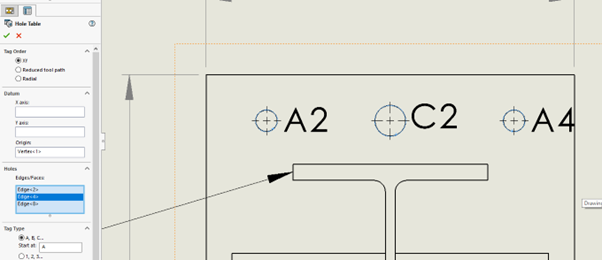
Figure 8 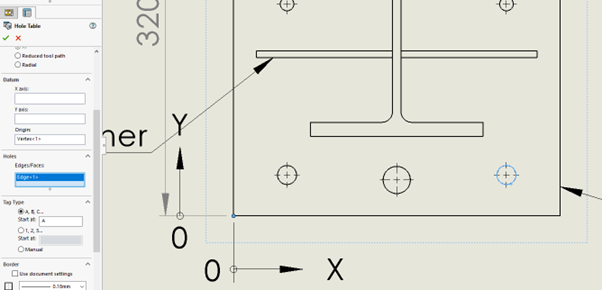
Figure 9 |
|
Step 4 : After located the Hole Table, edit the Hole Table and select other edges of the holes (No. 1-3) from right to left in the same horizontal axis. Be careful that you have to select upper hole (No. 4) in right hand side. |
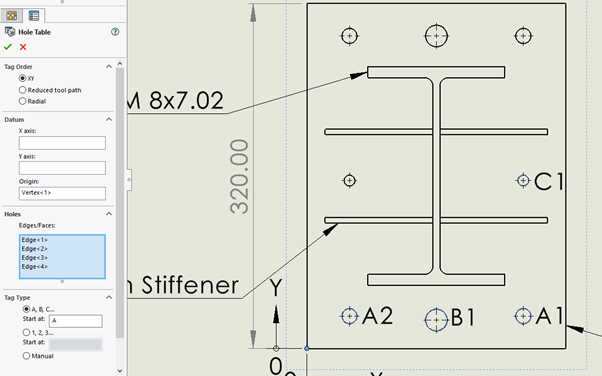
Figure 10 |
|
Step 5 : Repeat the Step 4 until you finish your work. |
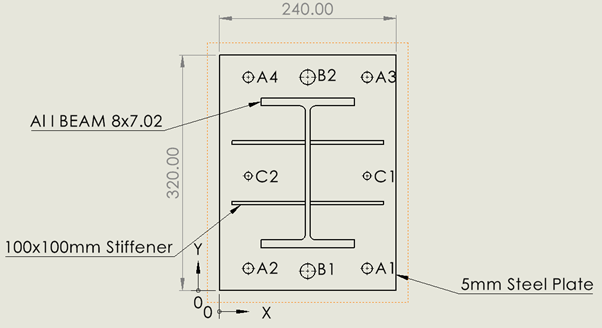
Figure 11 |
You can apply these methods to your other specific setting.
Written by Danny Cheung, Intelligent CAD/CAM Technology Ltd.
Source: Figure 1
https://grabcad.com/library/plastic-injection-mold-design-2-1


