SolidWorks | 零件建模中的圖案設計技巧
日期:2024-06-18 12:12:50 發布者: 瀏覽次數:次
Tips and Tricks of SolidWorks Patterning in part modelling
Creating pattern in SolidWorks is always easy but when it comes to a more complex design, the method you choose to create the pattern may lengthen the file rebuild time. In this blog, we are going to explode the most common methods of patterns and go through the pros and cons when creating a pattern feature.
在SolidWorks中創建圖案通常是相對簡單的,但對於更複雜的設計,所選擇的創建圖案方法可能會顯著增加文件重建的時間。在這篇博客中,我們將探討創建圖案特徵時最常見的方法,並討論每種方法的優缺點。
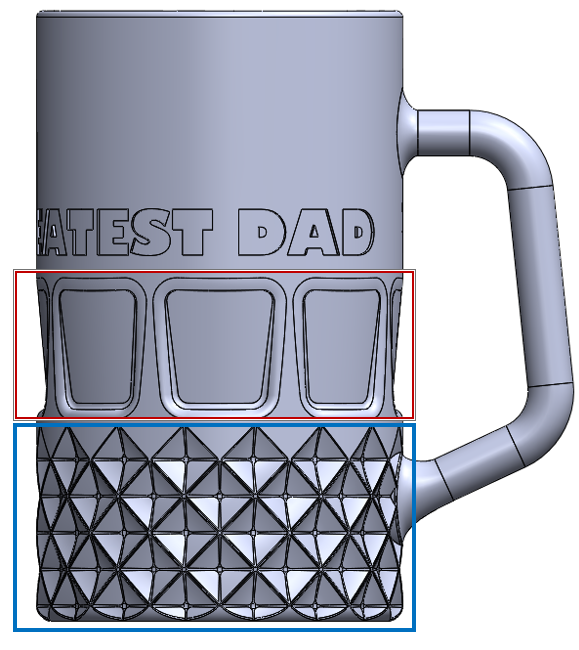
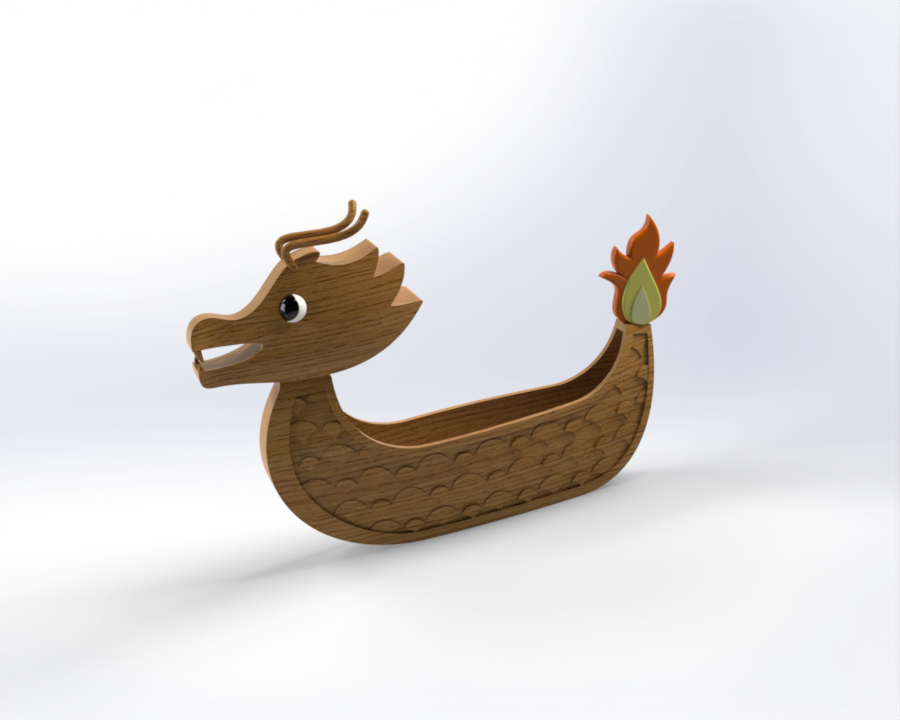
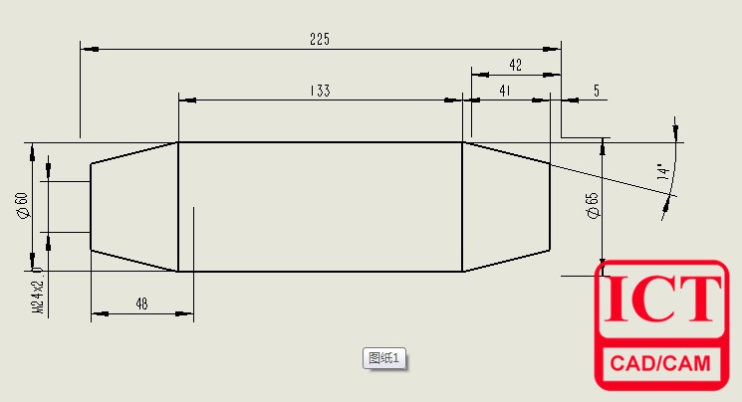
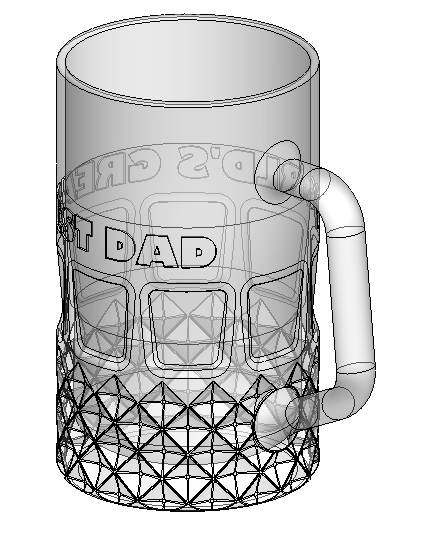
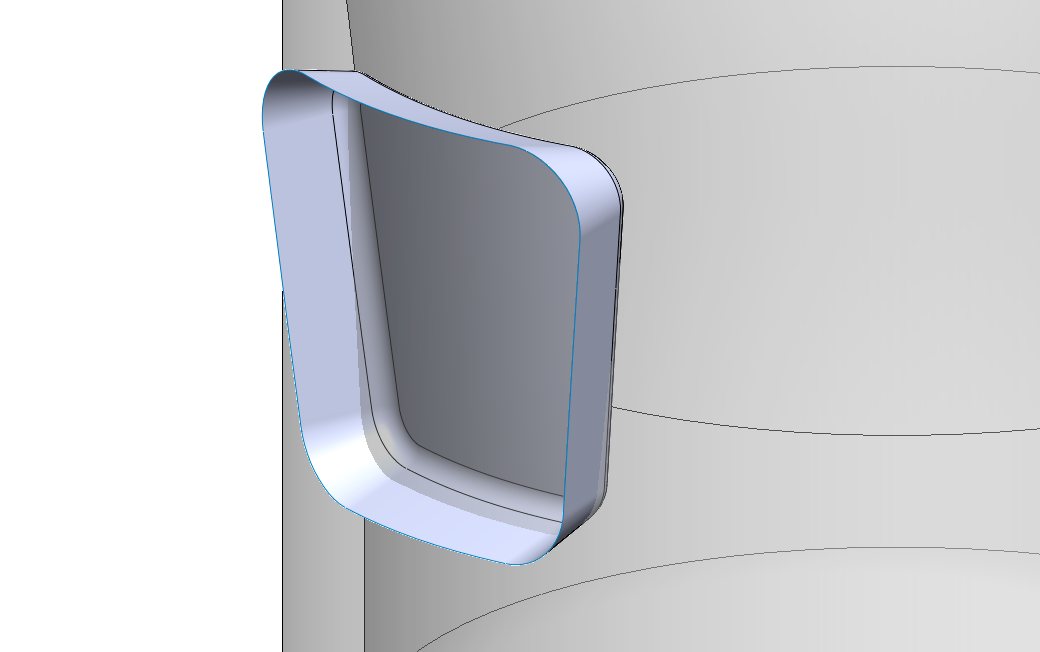
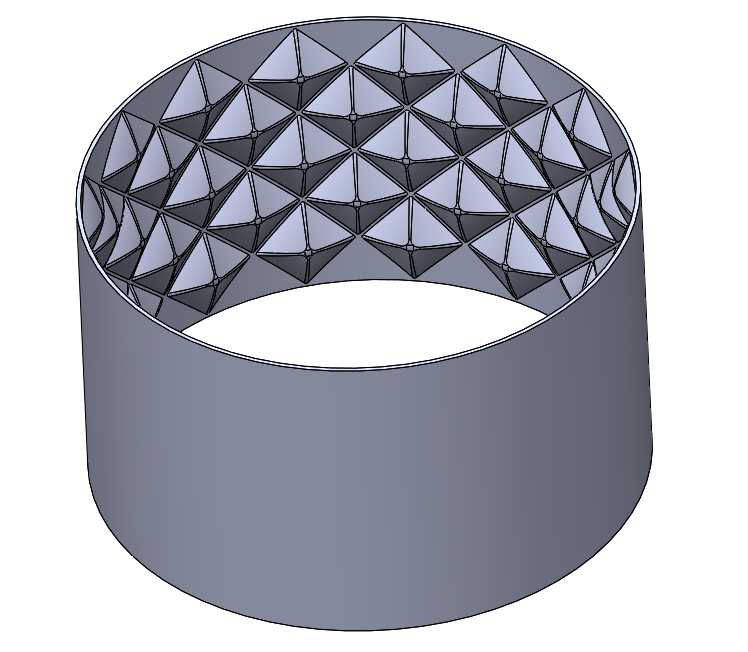
In this model, there are two patterns created by SolidWorks pattern feature, the dented shape in the middle and the diamond shape at the bottom. Notice the pattern lies around a cylindrical surface, circular pattern is used to create identical geometry around an axis. But first we have to create the seed pattern:
在這個模型中,有兩個圖案是由SolidWorks圖案特徵創建的,一個是中間的凹形圖案,另一個是底部的菱形圖案。請注意,這些圖案是繞著一個圓柱面排列的,圓形圖案用於在軸周圍創建相同的幾何形狀。但首先,我們必須創建種子圖案:
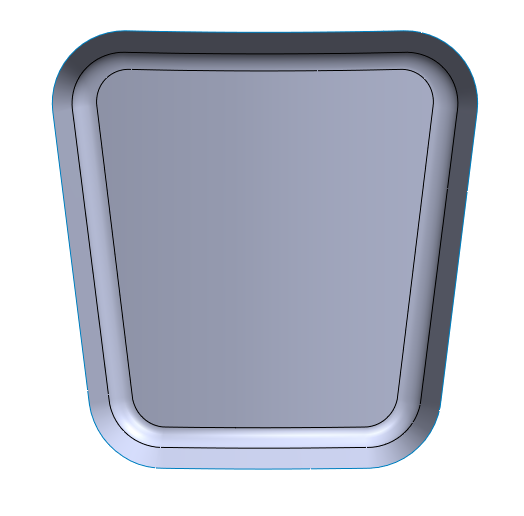
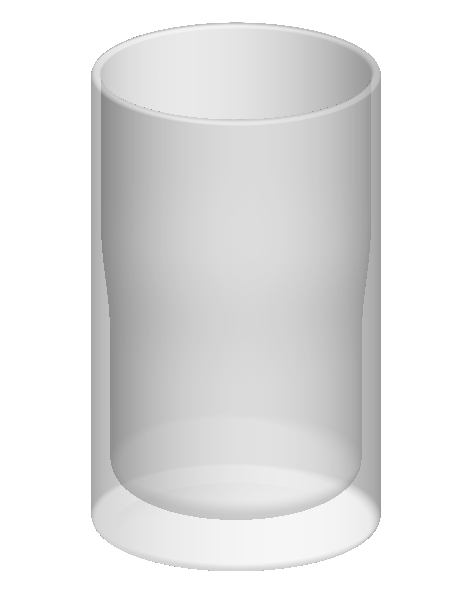
By offsetting and trimming the surface of the glass, we can add a ruled surface aroung the edge. This creates a surface that overlaps with the glass
通過偏移和修剪玻璃的表面,我們可以在邊緣周圍添加一個規則曲面。這創建了一個與玻璃重疊的曲面。
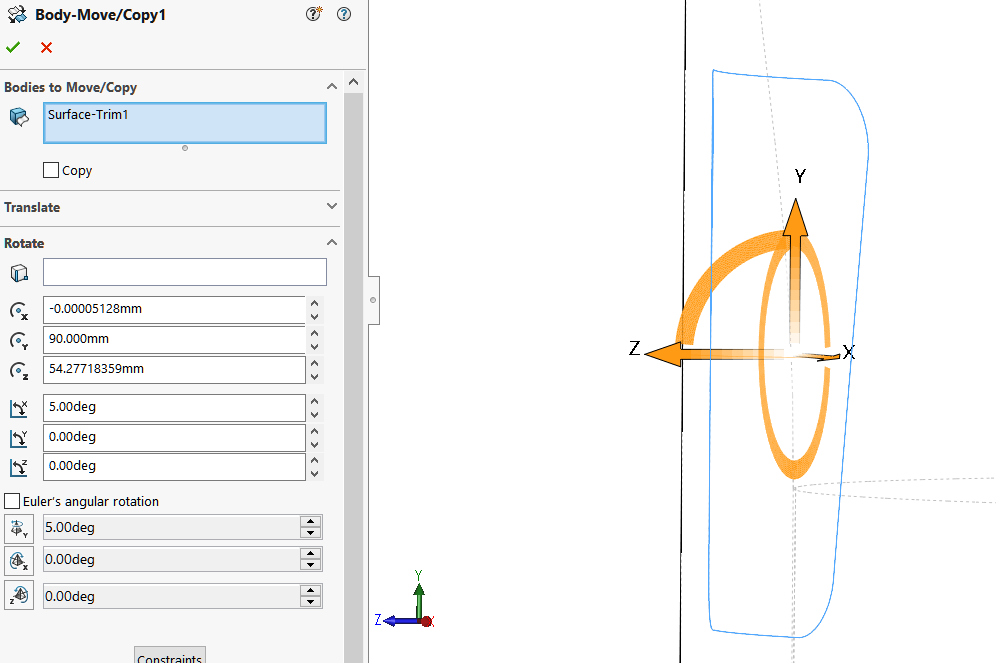
Use Body-move commend to tilted the surface body, forming an angle representing the pattern slope.
使用“Body Move”命令傾斜曲面體,形成代表圖案斜率的角度。
Use Surface-cut to remove the internal solid part within the surface.
使用“Surface Cut”命令來刪除曲面內部的固體部分。
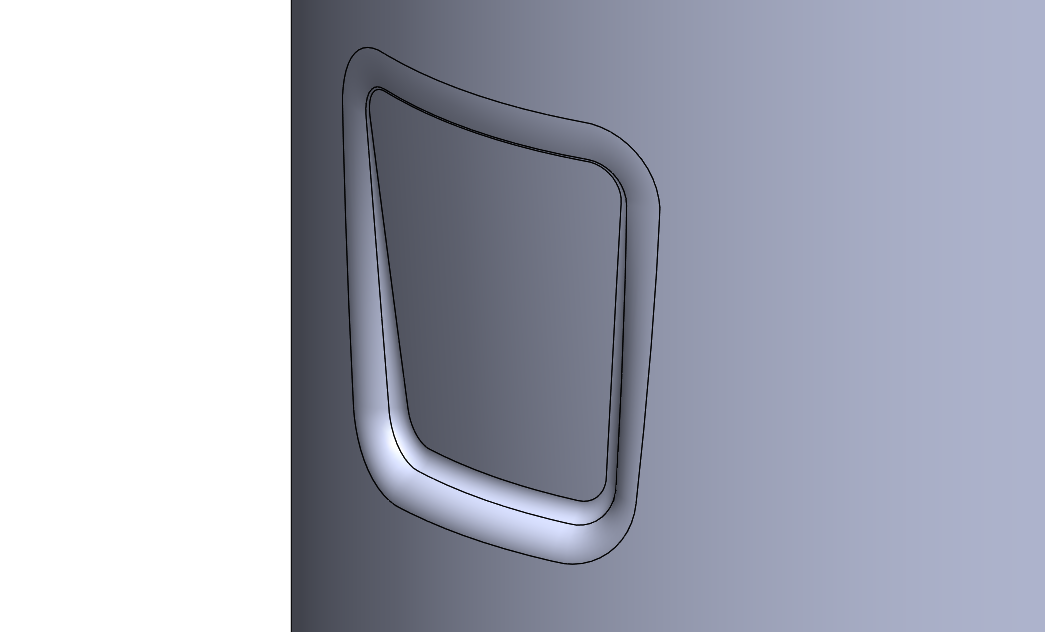
Add filter around the edges to smoothen out the shape.
在邊緣周圍添加濾鏡,以使形狀更加平滑。
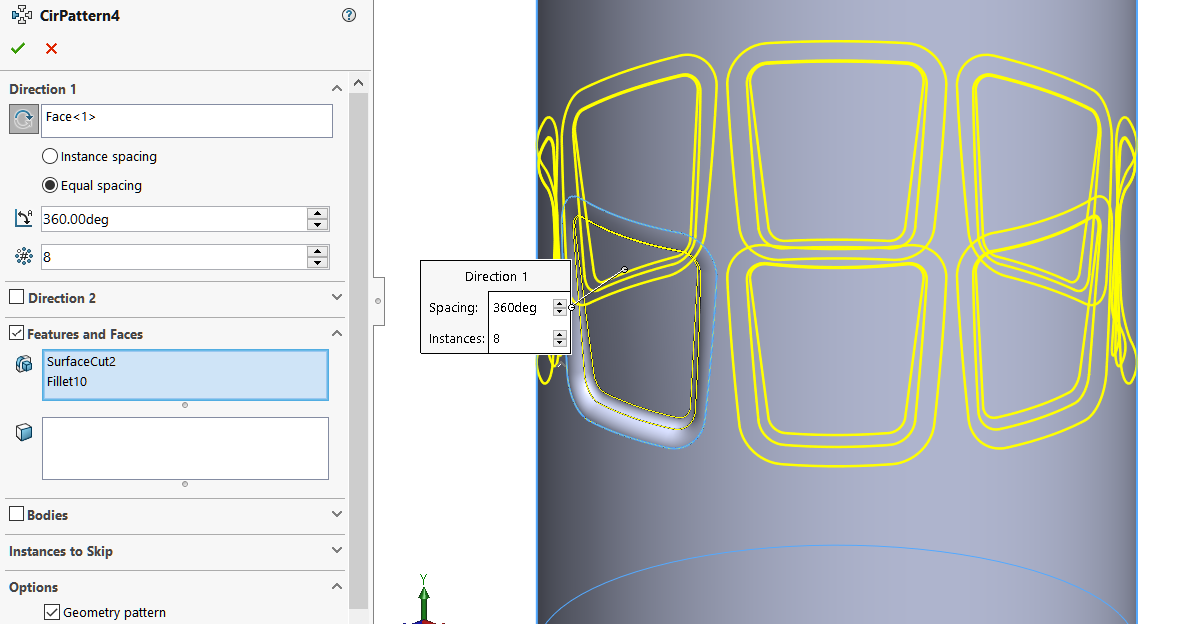
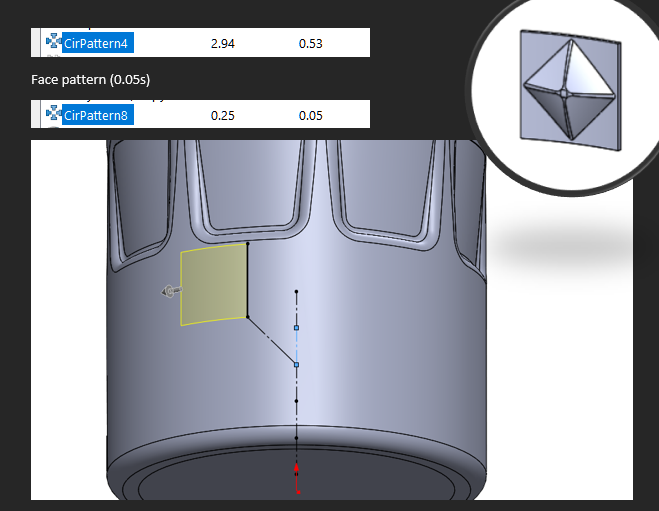
When using the circular pattern feature, we can use “Geometry pattern” to reduce the rebuild time. With geometry pattern checked, the pattern only copies, but does not solve the patterned features.
In this case, it copies the result by the surface cut and fillet feature, but not resolving these features in the new location. Hence shortening the pattern rebuild time.
使用圓形圖案功能時,我們可以使用“幾何圖案”來減少重建時間。勾選幾何圖案後,圖案只會複製,而不會解決圖案化的特徵。
在這種情況下,它複製了曲面切割和倒角特徵的結果,但不會在新位置解決這些特徵。因此,可以縮短圖案重建時間。
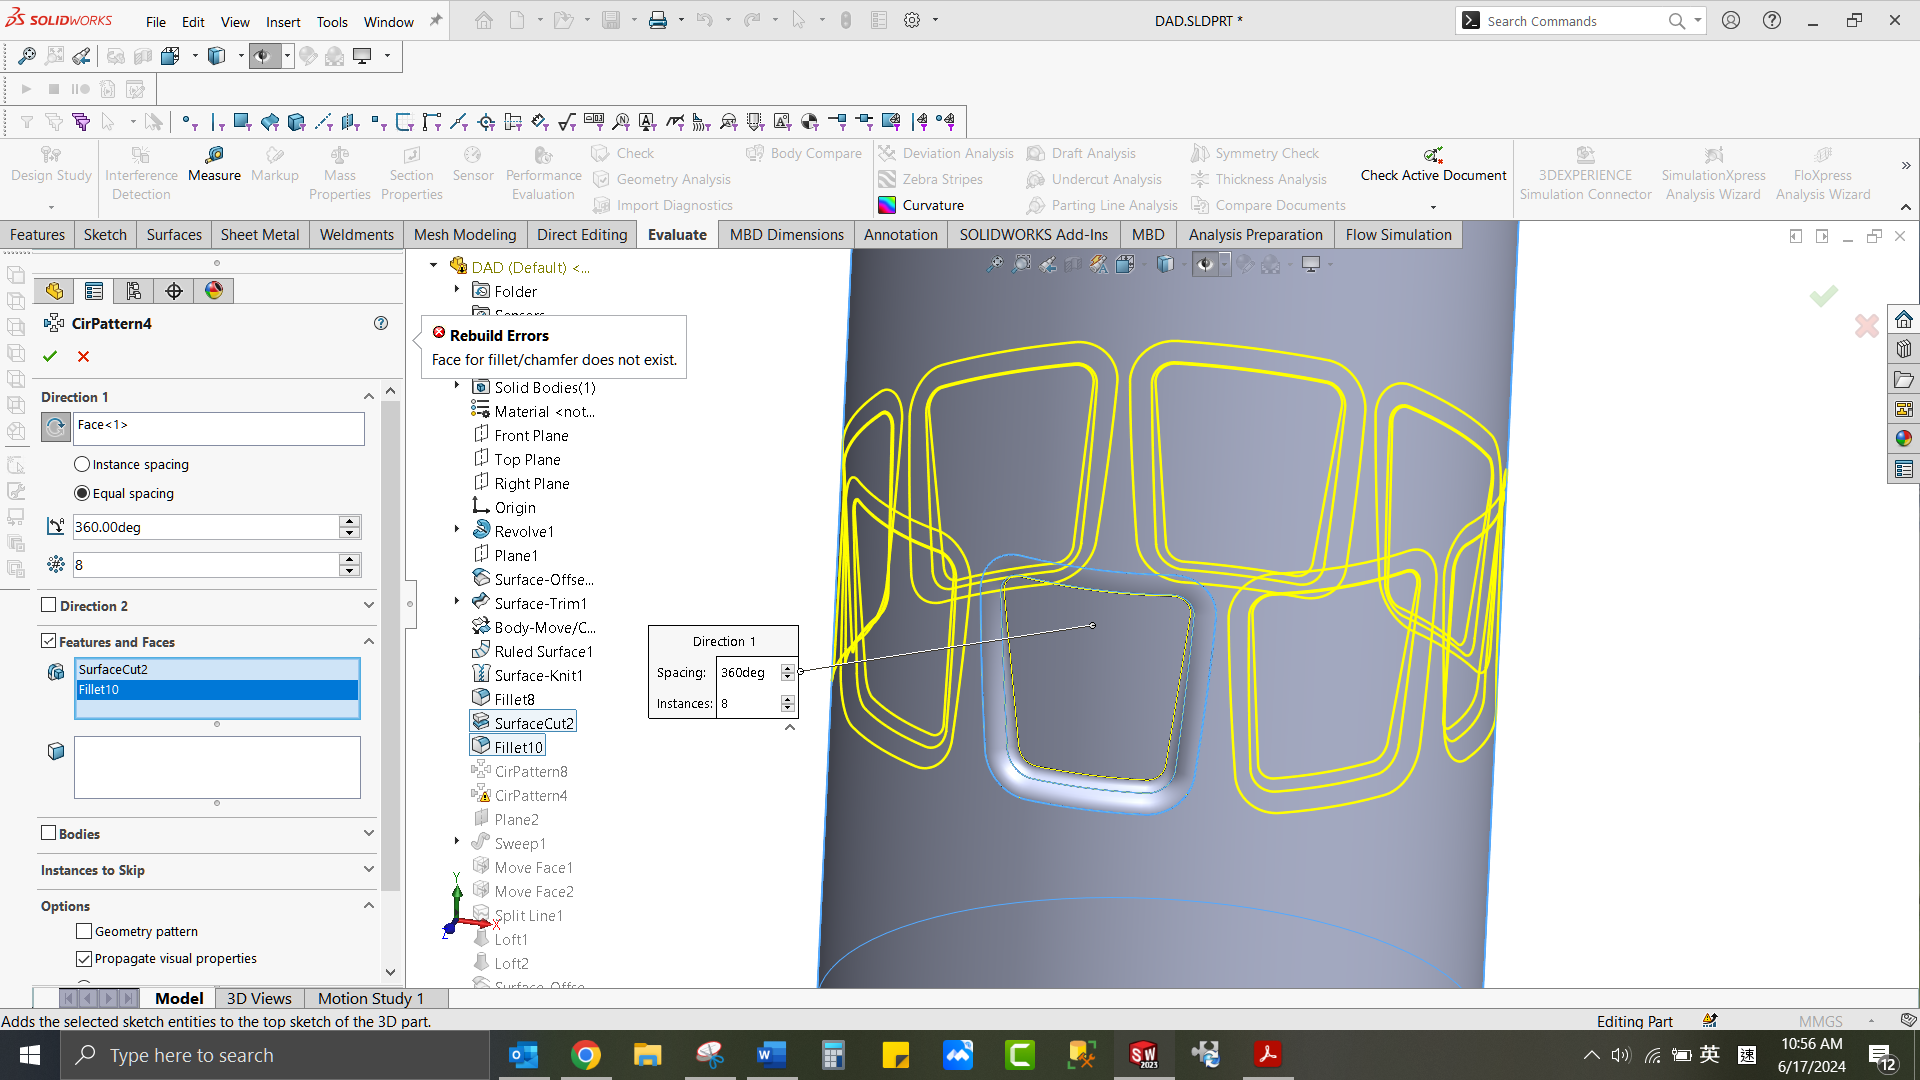
In this case the fillet cannot be patterned without geometry pattern as the face fillet results removed faces, causing error when creating patterns. Using geometry pattern here is one of the workarounds to get the pattern done.
Another workaround would be to use the “faces to pattern” option. Instead of selecting features that create the seed feature, faces that make up the seed features are directly selected. Note that when using the faces to pattern, the pattern must remain within the same face or boundary (just like feature pattern must be within the same solid body)
Below are the rebuild time used for:
Feature pattern with geometry pattern: (0.53s)
在這種情況下,如果不使用幾何圖案,倒角特徵無法進行圖案化,因為面倒角會移除面,進而在創建圖案時引起錯誤。在這裡使用幾何圖案是完成圖案的一種解決方法之一。
另一種解決方法是使用“面來進行圖案化”的選項。這裡不是選擇創建種子特徵的特徵,而是直接選擇組成種子特徵的面。請注意,使用面來進行圖案化時,圖案必須保持在同一個面或邊界內(就像特徵圖案必須保持在同一個固體體內一樣)。
以下是重建時間的比較: 使用幾何圖案的特徵圖案:(0.53秒)
For the diamond pattern, again the pattern seed is created.
If we directly pattern the surface-cut just like before, notice that the pattern should not be all-round when there is additional geometry like the handle in this model:
對於菱形圖案,同樣需要創建圖案種子。
如果我們像之前那樣直接對曲面切割進行圖案化,請注意,當模型中有額外的幾何形狀(例如手柄)時,圖案不應該是全圍繞的:
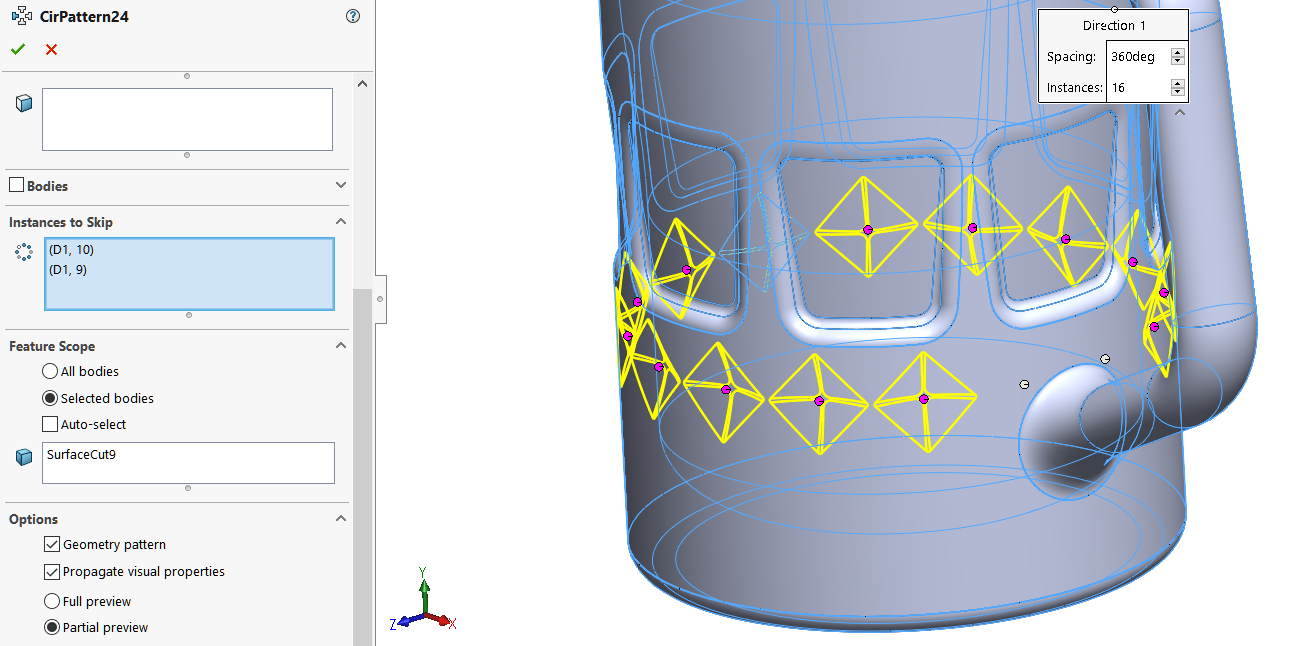
Using Instances to skip can avoid the problem for this loop. But we would need to set it for every layer of pattern. And it would result an area without pattern, which is not ideal.
使用“skip instances”可以避免這個循環的問題。但我們需要為每一層圖案設置它。這樣做會導致一個沒有圖案的區域,這不是理想的解決方案。
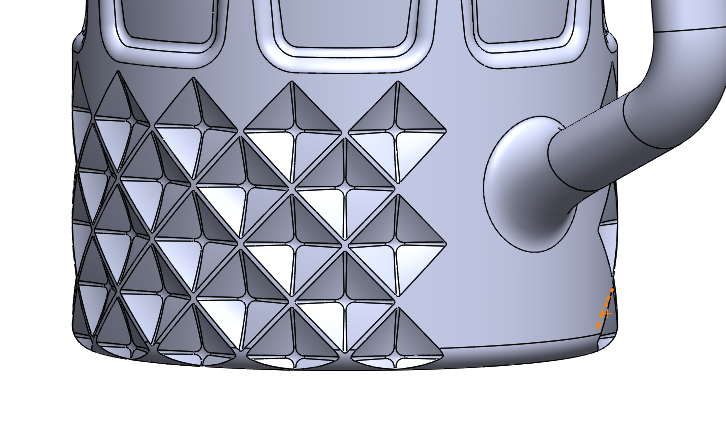
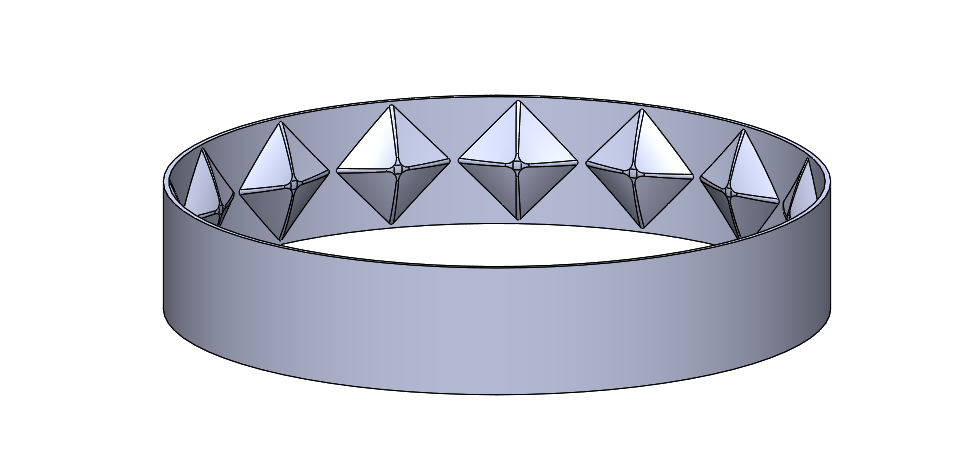
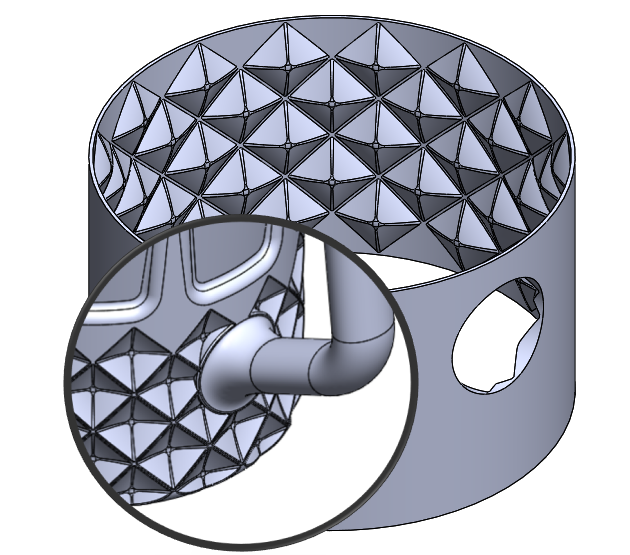
Instead of directly cutting the model and patterning the result. This time we will create the pattern on the tool itself by using circular pattern and linear pattern, then combine the result:
與直接切割模型並對結果進行圖案化不同,這次我們將通過使用圓形圖案和線性圖案在工具本身上創建圖案,然後將結果結合起來:
3.5
The advantage of doing so, is that we could further adjust the shape of the tool body, e.g. adding a hole to avoid pattern for a certain region, instead of using the “skip instances” option in the pattern feature. This can be done before you combine the tool and the target body with subtract option.
這樣做的好處是,我們可以進一步調整工具本身的形狀,例如添加孔以避免在某些區域進行圖案化,而不是在圖案特徵中使用“skip instances”的選項。這可以在將工具與目標體使用減法選項結合之前完成。
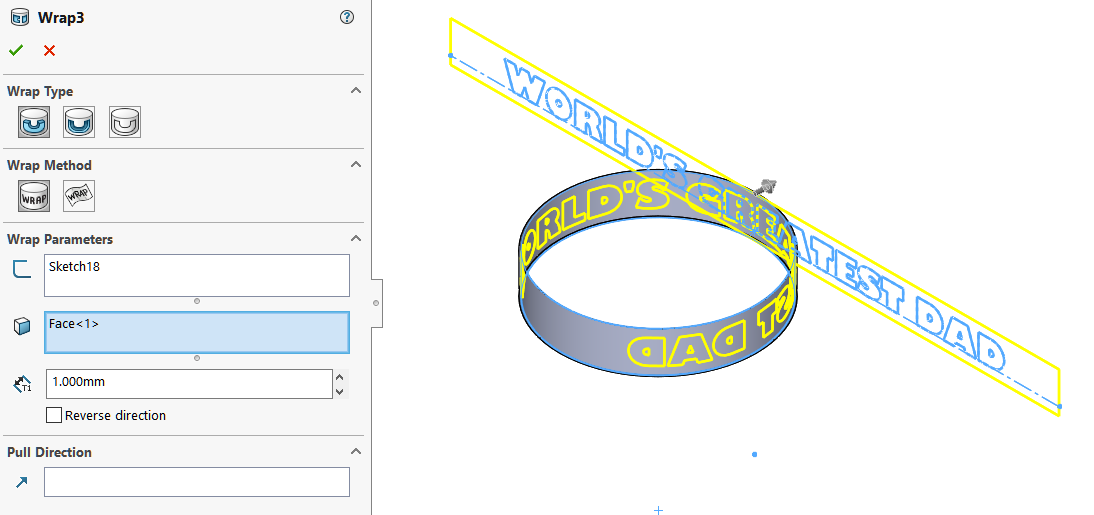
With similar concept, it could also be applied to different features other than pattern. For example, we need to wrap texts on the “cylindrical” surface with details on it:
Method1: Use Wrap – Deboss directly on the face by Analytical or Spline Surface method
使用類似的概念,這也可以應用於除了圖案之外的不同特徵。例如,如果我們需要在具有細節的圓柱形表面上包裹文字:
方法1:使用Wrap - Deboss功能直接在表面上進行,使用Analytical或Spline Surface方法。
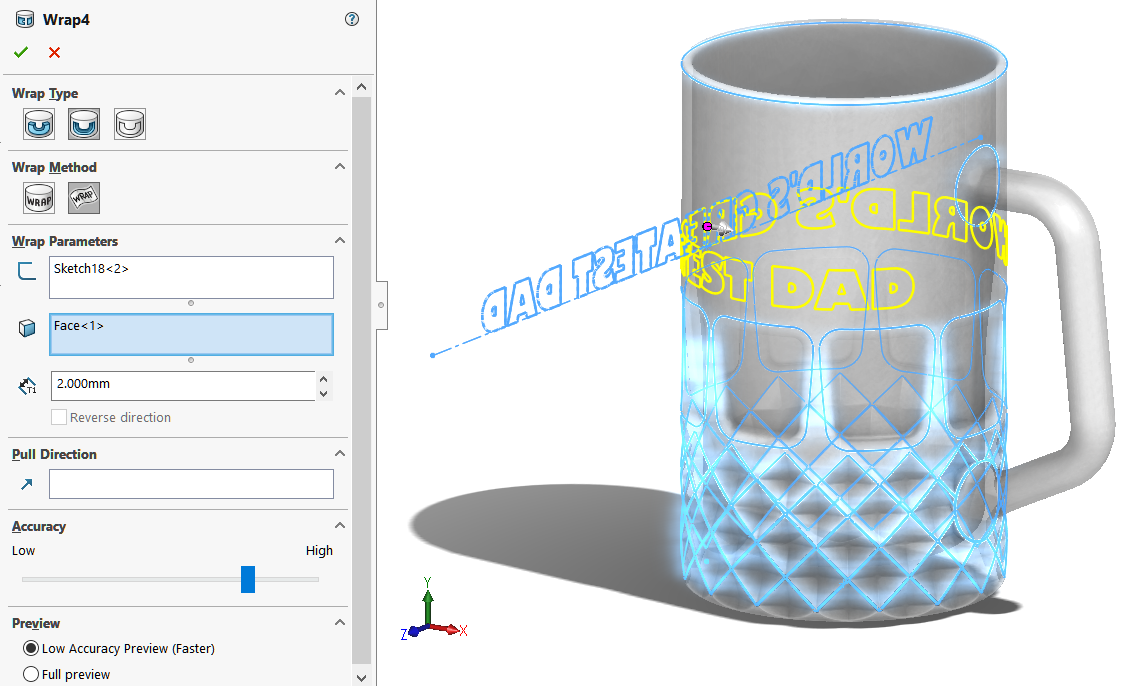
Method2: Create another simple solid and Use Wrap – Emboss , then combine to subtract the geometry
Method 2: 創建另一個簡單的實體,然後使用Wrap - Emboss功能,最後結合以減去幾何形狀。
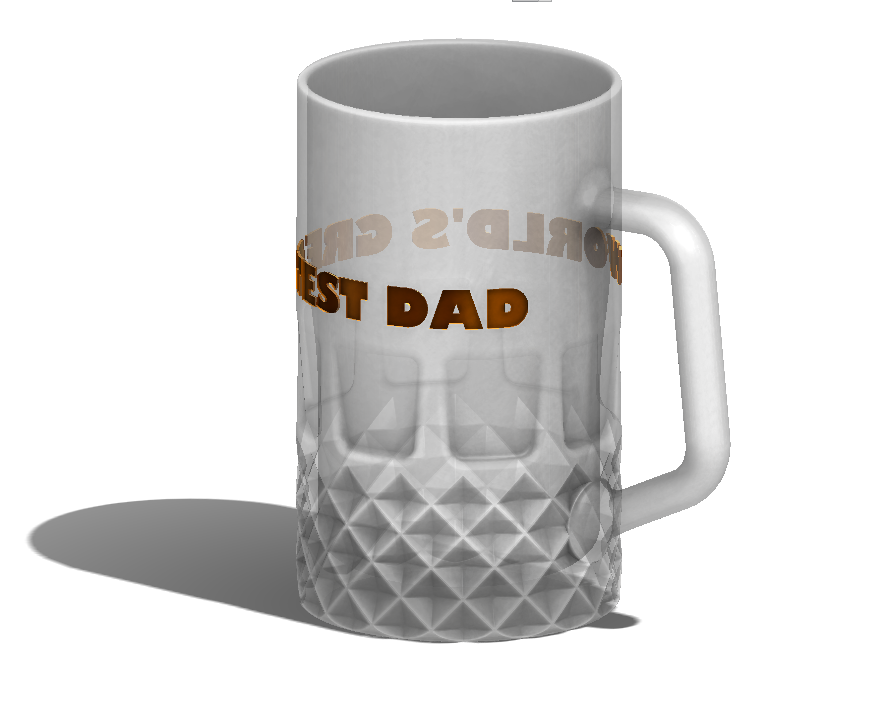
All methods give almost identical results:
所有方法幾乎都可以獲得相同的結果:
Rebuild time for:
Method1A – Direct Wrap - by Analytical
Total rebuild time in seconds (with "Freeze"): 5.94
方法1A – 直接使用Analytical進行Wrap:
總重建時間(秒)(凍結後):5.94
Method1B – Direct Wrap – by Spline Surface
Total rebuild time in seconds (with "Freeze"): 10.12
方法1B – 直接使用Spline Surface進行Wrap:
總重建時間(秒)(凍結後):10.12
Method2 – Wrap on ring and Combine
Total rebuild time in seconds (with "Freeze"): 1.08
方法2 – Wrap在環上並結合:
總重建時間(秒)(凍結後):1.08
As Wrap feature takes the target face as part of the calculation, keeping the face simple and clean could greatly reduce the rebuild time.
Hope you could learn more about relation between pattern and rebuild time. Cheers!
由於Wrap功能將目標面作為計算的一部分,保持面的簡單和乾淨可以大大減少重建時間。希望您能更多了解圖案和重建時間之間的關係。

Written by Jason Tse